
We found that there are two types of people when it comes to enjoying scents in their homes – those who prefer candles and those who prefer essential oil diffusers. However, there are also those who love both and would love to combine them by using essential oils in candle making.
While candles will always be a traditional method for creating an aroma, you can still use essential oils to create a beautiful scent. In fact, we found that making your own candles with essential oils is a great DIY project and the resulting candle is much healthier than anything you can buy on the market.
Not only is it a fun and creative activity, but you also have control over the quality of ingredients and the scent you want to create. By experimenting with different essential oils and candle-making techniques, you can find the perfect combination that suits your preference. So, why not try making your own candles with essential oils and enjoy the benefits of both worlds?
How are candles made?
During our testing, we found that many industrial candles contain toxins that are not healthy for us. This is why more and more people are opting to make their own candles at home. Making a standard candle is quite easy, requiring only soy wax and a wick. However, larger companies often add toxins to improve the quality, intensity, and durability of their candles, which can be harmful to our health when inhaled.
Creating your own candles allows you to control the ingredients used, resulting in a healthier product. By incorporating essential oils, you can create a candle that not only smells great but also provides aromatherapy benefits.
If you want to learn how to make your own essential oil candles, when we tried making them, we found it to be a quick and easy process. Simply follow the steps below to create your own healthy and fragrant candles.
How to make your own essential oil-based candle?
Creating your own candle is easy and requires only two main ingredients – soy wax and a wick. You can purchase both of these items from a specialty store or online retailers like Amazon or eBay.

Soy wax is available in a box and has a solid texture similar to that of a used candle or the residue left on your hand after a candle has been melted and cooled off. Essentially, you will receive a bag of soy wax scraps that can be used to make your own candles.
Get an appropriate container
When we were testing how to make our own candles using soy wax, one of the first things we had to do was find an appropriate container for the candle. While you may have seen candles without containers in stores, these are made using industrial methods that allow the wax to cool off in a mold before being taken out and sold.
For DIY candles, we recommend finding a glass jar or other heat-resistant material that can withstand temperatures between 115 and 154 degrees, the melting point of soy wax. Avoid using paper cups or lightweight plastic as they may not be able to handle the heat.
Prepare the wick in the middle of the container
The wick is crucial for the candle to burn correctly. It should be positioned in the middle of the candle, so you’ll need something to hold it in place while pouring in the melted wax. Some people opt for a specialized wick-centering tool, but in our analysis, we found that you don’t have to spend money on it.
You can use any object to center the wick, or even hold it with your hand for a short while after pouring the wax into the container. The important thing is to ensure that the wick is centered properly. If not, the candle won’t melt evenly, and only one side will melt, leaving the rest untouched.
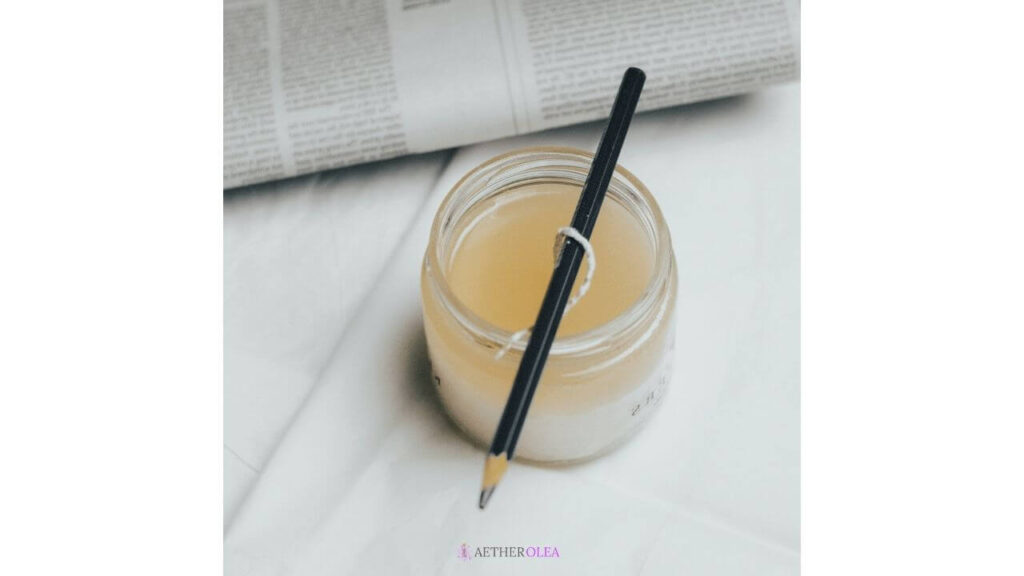
Make sure you have enough wick length. You want it to go way over the container, so the wick isn’t completely drowned inside when you pour the liquid. It needs to stay up and above the surface. You’ll cut the excess of it later.
Melt the wax in a different container
It’s best to take the soy wax out of the bag and place it in a separate container to melt. You can use a microwave or another heat source, but it’s crucial to apply just enough heat to melt the wax without boiling it. Overheating the wax can result in a fire hazard.
When we tried melting the wax in the microwave, we found that heating it in 30-second intervals and stirring in between worked best. This method ensures that the wax melts evenly and avoids any hotspots.
It’s essential to monitor the wax while melting it, as it can quickly become too hot and dangerous. Once the wax has melted and turned into a liquid form, it’s ready for the next step.
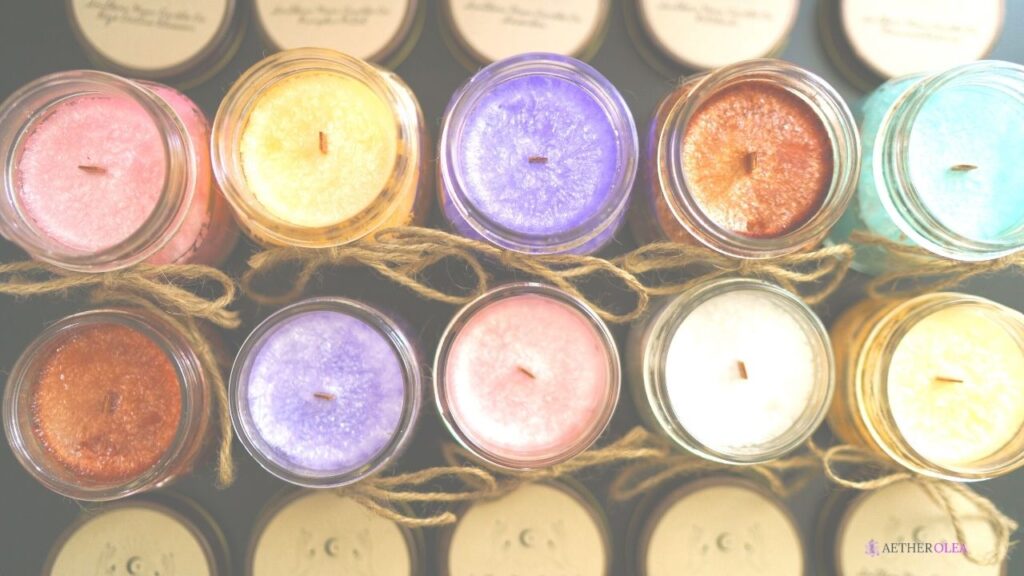
Add the essential oil of your choice
When we tried this DIY candle making process, we found that adding essential oils to the melted wax was a crucial step in achieving the desired scent. It’s important to mix the essential oil thoroughly into the liquid wax to ensure a consistent scent throughout the candle. The amount of essential oil you add can vary based on personal preference and the amount of wax you’re using. We recommend experimenting with different amounts to achieve your desired level of fragrance intensity.
Here you will read the benefits of the essential oils and aromatherapy, and their affect on the brain.
Crucial information about exposing essential oils to heat
During our testing, we discovered that essential oils have different heat tolerances, which is measured by their flashpoints. This term refers to the temperature at which the oil can withstand heat without losing its properties. It’s important to note that each essential oil has this information listed on the bottle or available online, so make sure to check it before adding it to melted wax.
When selecting essential oils to use in candle making, it’s crucial to choose ones with high flashpoints. This ensures that they won’t be compromised when mixed with the hot wax. However, if you want to use oils with lower flashpoints, you’ll need to wait for the wax to cool down a bit before adding them. Otherwise, you may end up with a regular candle that doesn’t retain any of the essential oil’s properties.
Wait for the wax to cool completely and enjoy
Once you have poured the wax and mixed in the essential oils, it’s time to let it cool off completely. We tried putting the container in the freezer and also letting it cool naturally overnight. Both methods worked well, so it’s up to your preference. However, it’s essential to wait until the candle is at room temperature before cutting the excess wick and lighting it.
Our analysis shows that purchasing scented candles online is a great alternative to making them yourself. However, when choosing to buy a scented candle, make sure to look for 100% soy wax and 100% pure essential oils to ensure quality. With this knowledge, you can now create your aromatic candle or purchase one with confidence.

Recent Comments